T’is The Season To Embrace The Mumpkin!
 Fall is a great time of year to decorate around your home. With seasonal garden accents such as ornamental kale, cabbage, sedum and pansies, to porches festooned with decorative pumpkins and gourds, to front doors adorned with wreathes and ears of Indian corn… autumnal decorating options abound.
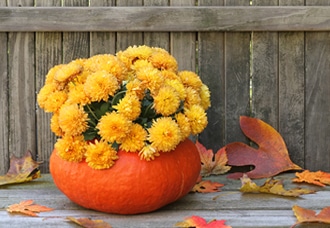
With so many options, how do you set yourself apart? We suggest that this fall you consider boosting your outside decorating creativity a notch by embracing the “Mumpkin”. The what? A mumpkin is a hybrid autumnal decoration that combines two seasonal favorites: The chrysanthemum and the pumpkin.
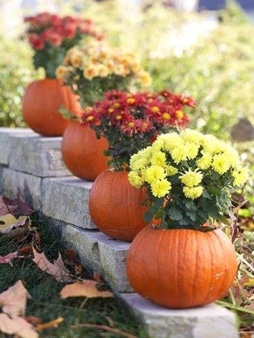
Using real pumpkins as mum containers is a fun ornamental way to embellish a step or a porch. Some people even use them as table centerpieces for fall events. Here are a six simple steps tips to help you on your way to mumpkin success:
 Pumpkin Selection: Choose pumpkins that are about 2 inches taller and 4 inches wider than the mums’ original containers. Each pumpkin needs to be large enough to hold more soil than is in its mum’s container as well as its mum’s root ball.
- Carving Your Pumpkin: Insert a carving knife carefully through a pumpkin’s thick skin about 3 inches from the stem. Work the knife carefully around the pumpkin’s circumference. Remove the top of the pumpkin. Scrape the seeds and pulp from the pumpkin’s interior with a spoon until nothing is left inside.
- Drainage: To provide a way for water to drain, drill a hole in the center of the pumpkin’s bottom with a 1/4-inch drill bit. Start the drill slowly, and run the drill bit completely through the pumpkin’s skin, or rind.
- Preserve Your Pumpkin: Mix a solution of 1 part bleach and 1 part water in a bucket. Put the solution in a spray bottle. Spray the solution on each pumpkin’s interior and exterior until the pumpkin is completely saturated with the solution. Let the pumpkins dry completely, which should take about 20 minutes. The solution will preserve the pumpkins.
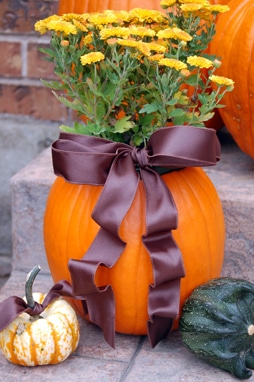
- Planting Your Mums: Place a 1-inch deep layer of potting soil mix in the bottom of each pumpkin. Remove one mum from its original container and insert its root ball into a pumpkin until it is about 1 inch lower than the pumpkin’s cut brim. Add potting soil mix around the mum until the soil is even with the top of the plant’s root ball. Do not pack the soil as you place it inside the pumpkin. Use the same method to plant a mum in each pumpkin.
- Water Thoroughly: Your newly planted mums should be watered thoroughly until their soil is saturated evenly to a depth of 2 inches. Place the pumpkins containing mums in a cool, dark area, away from direct sunlight. Let the soil dry out before watering the mums again, saturating the soil evenly to a depth of 2 inches. Continue to let the soil dry out between watering sessions.
That’s all it takes for you to become a “Mumpkin Master”… and the envy of all of you’re neighbors! Here’s a checklist of the tools you’ll need:
 Carving knife
- Spoon to scoop out the pumpkin
- Drill
- 1/4-inch drill bit
- Bucket for mixing your preserving solution
- Bleach
- Spray bottle
- Potting soil mix
- Watering can or garden hose
After pumpkins are cut and mums planted inside them, the pumpkin planters should last about two weeks. When the pumpkins start to show signs of decay, simply plant them in the ground – with the mums inside. The mums will add color to the landscape, and the pumpkins will add nutrients to the soil as they decompose.
We’d love to see how your mumpkins turn out, so please take a picture of your Mumpkin Masterpiece and share it with us on our All American Roofing Facebook page, which you can access by clicking here.